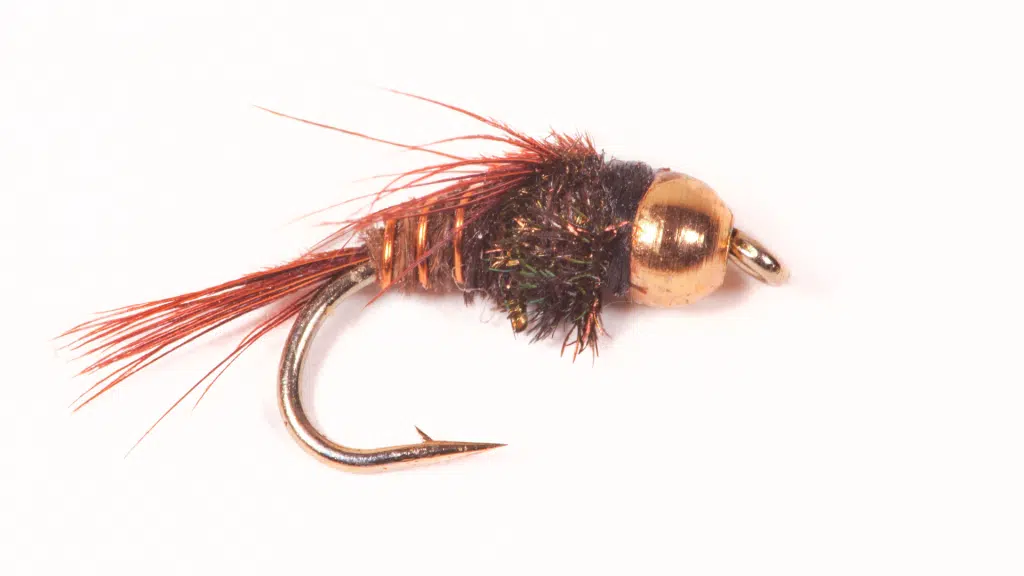
Welcome to fly tying: How to tie a Pheasant Tail Nymph!
If you’re new here or a seasoned fisher, tying a pheasant tail nymph is a great skill to learn.
This simple fly is a favorite because it works so well in the water, imitating the small bugs fish love. Most fishermen always carry a Pheasant Tail with them on the river!
In this guide, we’ll show you how to make one step-by-step.
Let’s get started and bring you closer to the joy of fishing with your own handmade flies. It is a feeling that can’t be beat!

Materials Needed
To start tying your own pheasant tail nymph, you’ll need a few basic items. Collecting the right materials helps ensure your fly is both attractive and durable. Kits can be found for beginners, purchasing a kit may be better for you then purchasing individual items at this time.
Here’s what you’ll need:
- Hook: Size 12-16 nymph hook works best for beginners. Find Hooks On Amazon Here.
- Thread: Use fine, strong thread in black or dark brown to keep everything tightly bound. Find Thread On Amazon Here.
- Tail and Body: Pheasant tail fibers are essential as they form both the tail and body of the nymph. Find Pheasant Tail Fibers On Amazon Here.
- Ribbing: Copper wire not only adds a bit of weight but also secures the pheasant tail fibers, enhancing the fly’s durability. Find Copper Wire On Amazon Here.
- Thorax: Peacock herl is used here for its natural iridescence, which is great for attracting fish. Find Peacock Herl On Amazon Here.
- Head: A small amount of the same thread used at the start to finish off the fly neatly. Use thread found under step 2.
Each of these materials plays an important role in making your pheasant tail nymph look and function as intended. Next, we’ll dive into the step-by-step instructions to assemble these components into a successful fishing lure.

Important Tools for Fly Tying
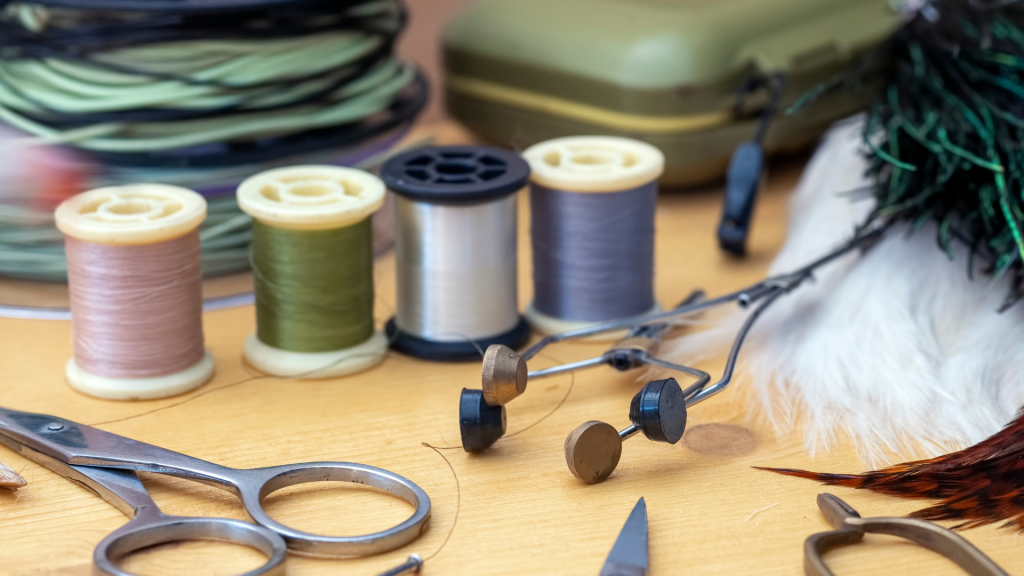
Besides the materials, having the right tools can make the process of tying a pheasant tail nymph much easier and more enjoyable. When purchasing tools, it is important to remember, a stronger more durable tool(at a higher price point) is better in the long run.
Here are the essential tools you’ll need:
- Vise: A good vise holds your hook securely, making it easier to work with the fine details of your fly. Here is the Griffin Odssey on Amazon.
- Scissors: Sharp scissors are crucial for cutting materials cleanly without fraying.
- Bobbin: A bobbin holds your thread spool and provides tension, allowing for smooth, controlled wrapping.
- Whip Finisher: This tool helps you tie off the thread neatly at the end of your fly, ensuring everything stays in place.
- Hackle Pliers: These are optional but helpful for gripping and wrapping the more delicate materials like pheasant tail fibers and peacock herl.
Here is an equipment kit for fly tying on Amazon.
With these tools at your side, you’ll be set to tackle the art of fly tying with confidence and precision. In the following sections, we’ll guide you through how to use each tool effectively as you build your nymph.
Step-by-Step Tying Instructions
Above is a great video we recommend to follow for visual learning!
Now that you have your materials and tools ready, let’s begin tying your pheasant tail nymph.
Follow these steps carefully to create an effective and attractive fly:
- Preparing the Hook
- Secure the hook in your vise with the point facing you. Make sure it’s held firmly to prevent any movement as you work.
- Attaching the Thread
- Start by attaching your thread near the eye of the hook. Wrap the thread tightly back towards the bend of the hook to create a smooth base for your materials.
- Tail Tying
- Select three to four pheasant tail fibers. Measure them so they are roughly the length of the hook shank. Tie them at the bend of the hook to form the tail, securing with several tight wraps.
- Ribbing
- Cut a small piece of copper wire and tie it in at the bend where you secured the tail. This will be wrapped forward later to add durability and a bit of shine to the body.
- Creating the Body
- Wrap the remaining pheasant tail fibers forward towards the eye, covering the thread base. Once you reach about two-thirds up the hook shank, secure the fibers with your thread.
- Applying the Ribbing
- Spiral the copper wire forward over the wrapped pheasant tail fibers to the point where you stopped. This not only secures the fibers but also adds a segmented look to the nymph. Secure the wire with the thread and trim any excess.
- Thorax and Legs
- Tie in a few strands of peacock herl at the point where you ended the body. Wrap the herl around the hook shank to form a thicker, more pronounced thorax. This part should look bulkier than the body to mimic the natural insect.
- Finishing Touches
- Once the thorax is complete, use a whip finisher to tie off the thread near the eye of the hook. Make several secure knots and cut the thread. Apply a small drop of clear nail polish or head cement to the knots for extra durability.
- Once the thorax is complete, use a whip finisher to tie off the thread near the eye of the hook. Make several secure knots and cut the thread. Apply a small drop of clear nail polish or head cement to the knots for extra durability.
By following these detailed steps, your pheasant tail nymph will be ready for action. Remember, practice makes perfect, so don’t hesitate to tie multiple nymphs to refine your skills.
Additional Resources
Mastering the pheasant tail nymph is just the beginning. There’s a whole world of fly tying to explore, and many resources available to help you advance your skills and knowledge. Here are some recommended additional resources to deepen your understanding and broaden your fly tying repertoire:
- Books
- “The Fly-Tier’s Benchside Reference” by Ted Leeson and Jim Schollmeyer: This comprehensive guide offers detailed instructions on various tying techniques and patterns. Find Here On Amazon.
- “The Fly-Tier’s Benchside Reference” by Ted Leeson and Jim Schollmeyer: This comprehensive guide offers detailed instructions on various tying techniques and patterns. Find Here On Amazon.
- Online Tutorials
- YouTube Channels: VenturesFlyCo.
- YouTube Channels: VenturesFlyCo.
- Community Forums
- Reddit r/flytying: A vibrant subreddit where you can ask questions, share your creations, and learn from other hobbyists’ experiences. Reddit Link Here.
These resources will help you not only perfect your technique in tying the pheasant tail nymph but also explore new patterns and styles to enhance your fly fishing adventures.
Congratulations on learning how to tie a pheasant tail nymph, a staple in the fly fishing world!
By following the detailed steps provided in this guide, you’re now equipped to create a lure that’s not only effective in attracting fish but also a testament to your craftsmanship.
Remember, the key to mastering fly tying is practice and patience. Each fly you tie enhances your skill and deepens your connection with the sport of fly fishing.
As you continue to refine your technique, don’t hesitate to experiment with variations in size, color, and materials to see what works best in your local waters.
The skills you’ve learned here are just the beginning of your fly tying journey, and there’s much more to explore and enjoy in this rewarding hobby.
We hope this guide has been helpful, and we encourage you to share your experiences and creations with the fly tying community.
Happy tying!

